
CF-ProxyIPChecker
What Is a ProxyIP?
Cloudflare has a deliberate design limitation (often mislabeled by users as a "bug"): you cannot reach one Cloudflare-hosted service from inside Cloudflare's own network. When you build a Worker and try to use it to reach a site that sits behind Cloudflare (say, the Cloudflare dashboard itself, or a service like Spotify), the request would travel from inside Cloudflare's network to another destination inside that same network. This creates a risk of an infinite loop — especially dangerous for WebSocket connections and long-lived TCP sessions, which, unlike a simple HTTP request, tie up datacenter resources — and it also triggers a security rule that blocks it outright, returning the well-known Error 1000 (DNS points to a prohibited address).
A ProxyIP exists specifically to break that loop: a third-party IP address, outside Cloudflare's CDN, is introduced as a relay. The Worker connects to the destination through that IP, and since the traffic now appears to Cloudflare as coming from outside its network, it no longer runs into the loop problem.
Why Can One IP Act as Both a Proxy and a "Clean" IP?
There are two scenarios:
- A public reverse proxy — many of the ProxyIPs shared in channels and on GitHub are actually addresses belonging to Amazon Cloudfront, Fastly, Gcore, or generic Nginx servers configured as open reverse proxies. Because these servers sit outside Cloudflare, they can both play the role of a proxy and relay a request to a destination behind Cloudflare, and also correctly route client traffic to the right domain and SNI when used as the server address in a config.
- Cloudflare's own routing trick — if, instead of an external IP, you use the IP of a different Cloudflare Edge datacenter (in another country or subnet), the Worker is forced to route the traffic out of its own internal network and send it to that Edge; from Cloudflare's point of view, this request has arrived from a legitimate external boundary, and no loop is detected. Because this IP genuinely belongs to Cloudflare itself, it also plays the role of a clean IP on the client side.
Fallback with NAT64
Some well-known projects (such as cmliu's and Yong's code) have used NAT64 technology as an alternative or fallback to a ProxyIP. NAT64 is not a proxy — it's a network address translation technology: it generates a synthetic IPv6 address (with the well-known 64:ff9b::/96 prefix) that Cloudflare translates into a real IPv4 address. Previously, when the ProxyIP went down, the Worker would essentially become half-crippled; now, with NAT64 as a fallback, if no ProxyIP is defined or it's broken, the Worker routes traffic through this path instead and stays out of the loop.
Project Architecture
The system consists of three main parts that work together:
| Part | Role |
|---|---|
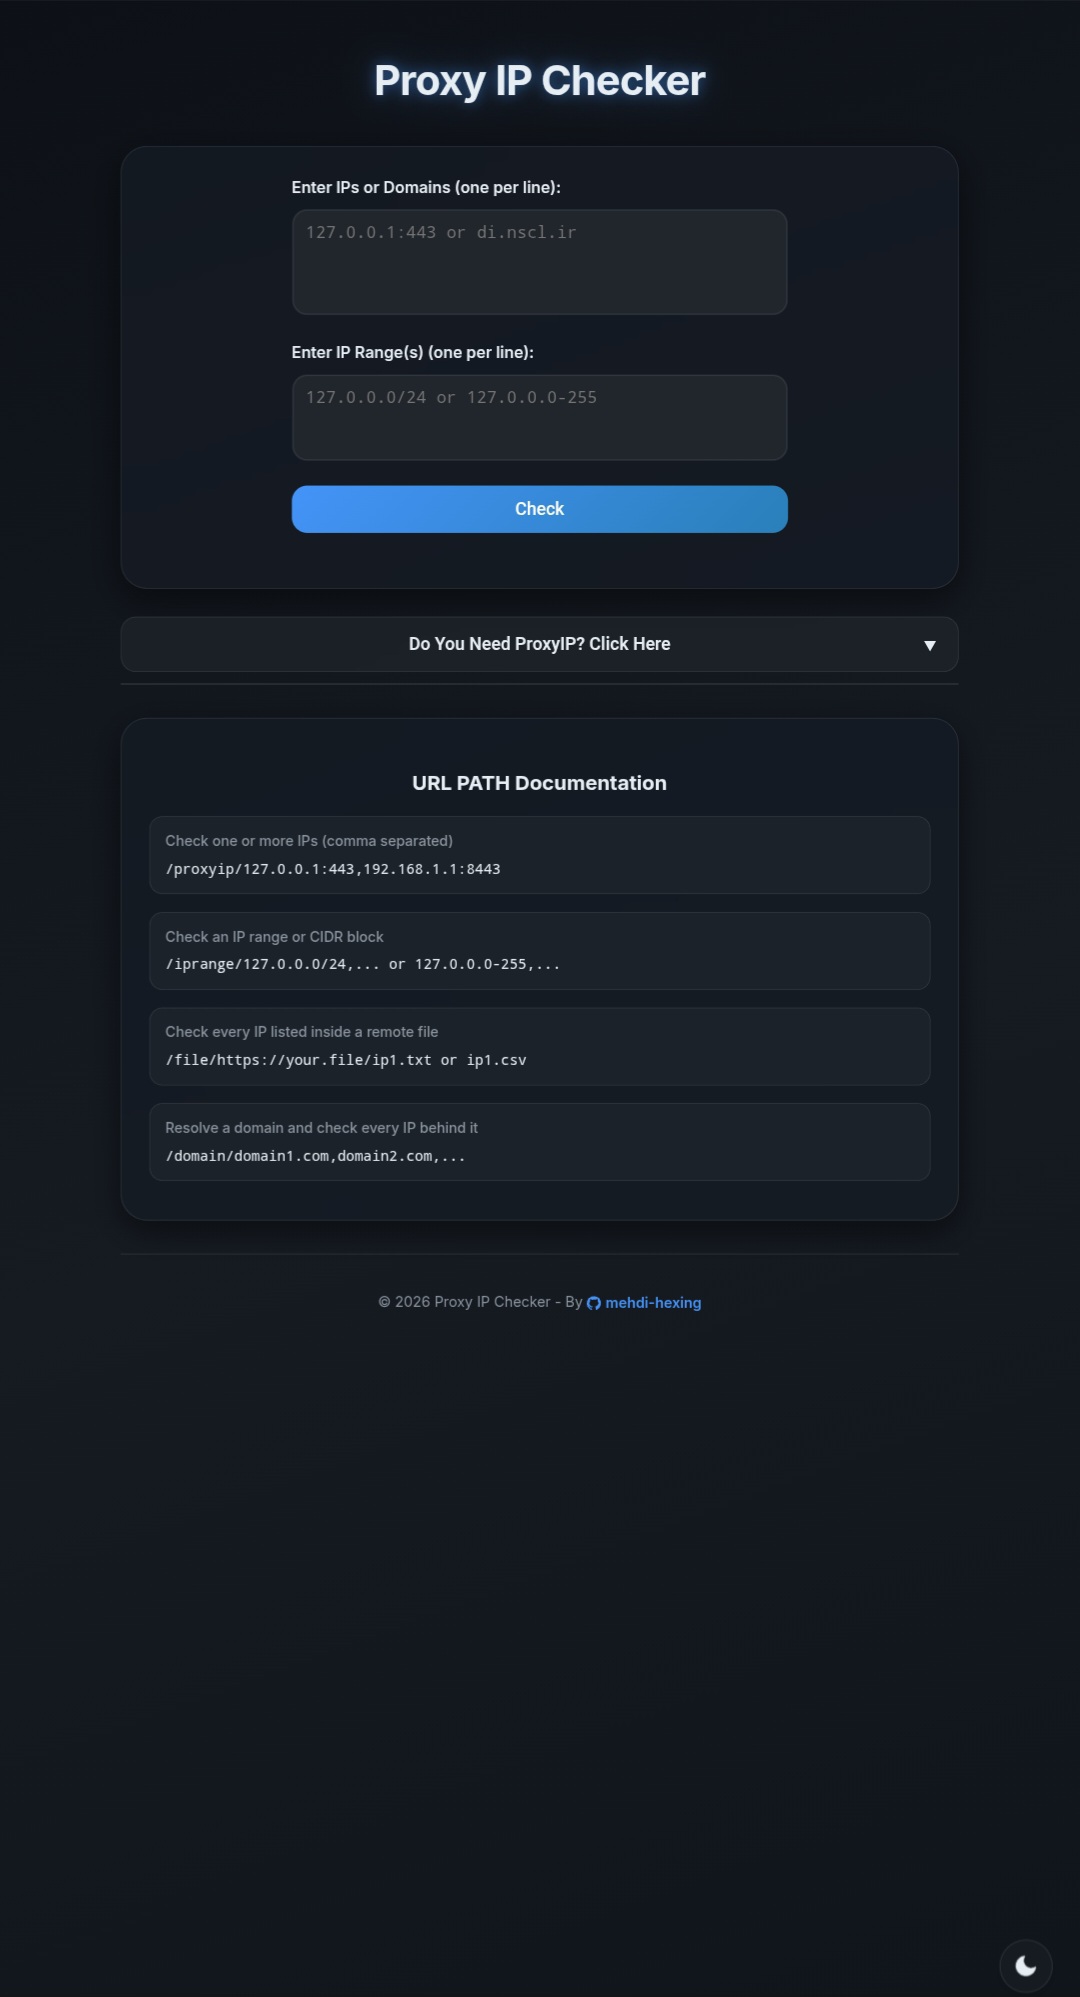
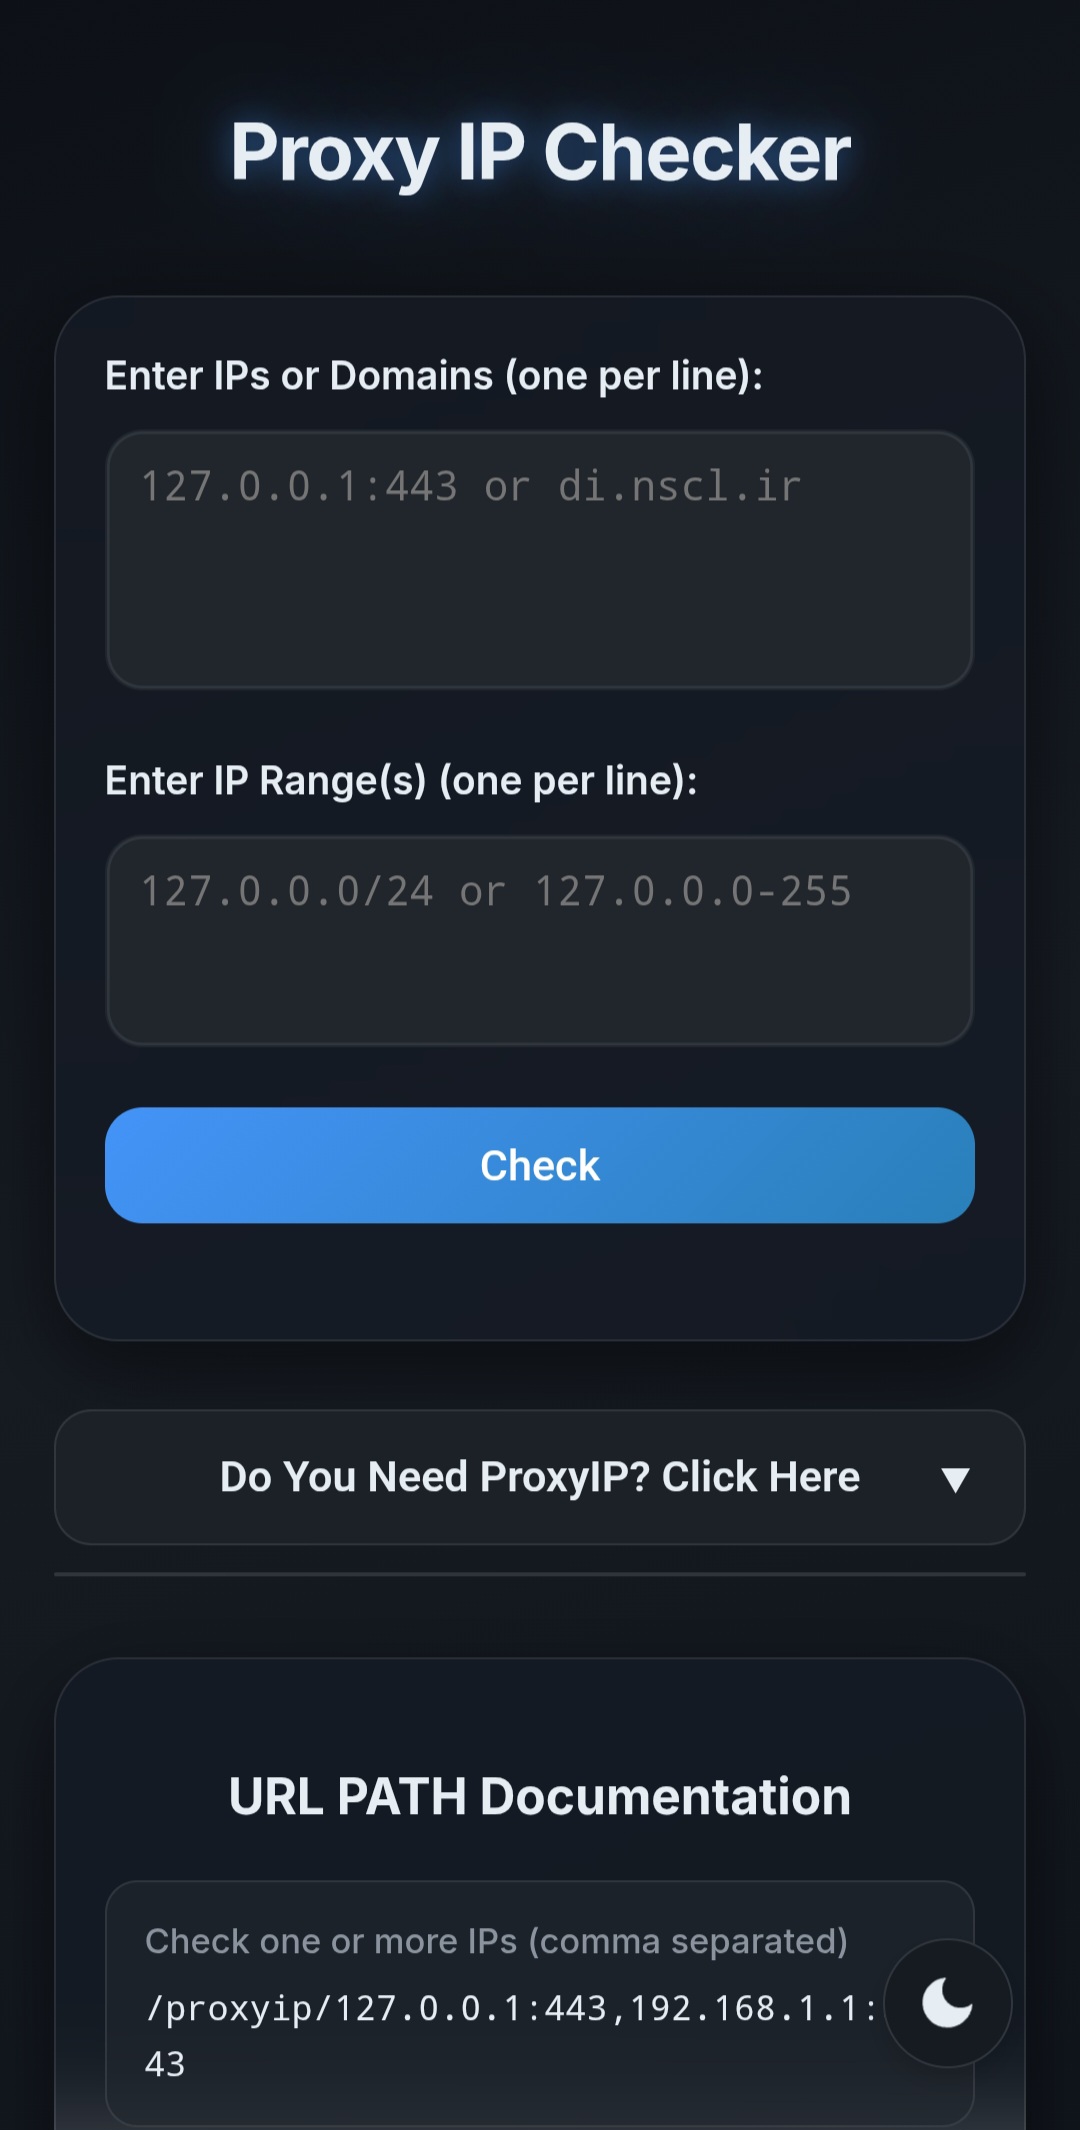
| Frontend UI | A static web page served via Cloudflare Pages or Workers; with a glassmorphism look, a light/dark theme inspired by GitHub, and a mobile-friendly layout |
| Cloudflare Worker | The core application logic; handles the frontend's requests, resolves domains (both IPv4 and IPv6), and communicates with the backend services |
| Backend API | An external service that performs the actual TCP connection test against proxy IPs — since the Worker is limited in making arbitrary outbound TCP connections and, as a result, cannot correctly validate some proxy IPs on its own. This service can run on Vercel, Render, or a personal server, and you can access it on my GitHub or at the end of this document. |
Workflow in short: the user interacts with the frontend UI (on Pages/Workers), the frontend UI communicates with the Cloudflare Worker, and the Worker interacts with the backend service and Scamalytics — both of these have automatic fallbacks.
Key Features
- Accepts diverse input formats: a single IP, a list of IPs or domains, an IP range (CIDR or hyphenated), or even the URL of a raw TXT/CSV file
- Full IPv4 and IPv6 support: plain form, bracketed form, and bracketed form with a port — you can enter any of these IP formats into the tool
- Risk analysis with automatic fallback: each IP gets a risk score ("low", "medium", "high") from Scamalytics. If the official service isn't configured, has hit a rate limit, or is temporarily unavailable, the Worker automatically switches to a public mirror; because of this, setting up a Scamalytics key is optional, and for light usage you won't need the official Scamalytics API at all.
- Resilient check endpoint: if the external backend service errors out for any reason, the Worker itself performs a direct TCP test as a last resort so that one unstable request doesn't ruin the whole user experience.
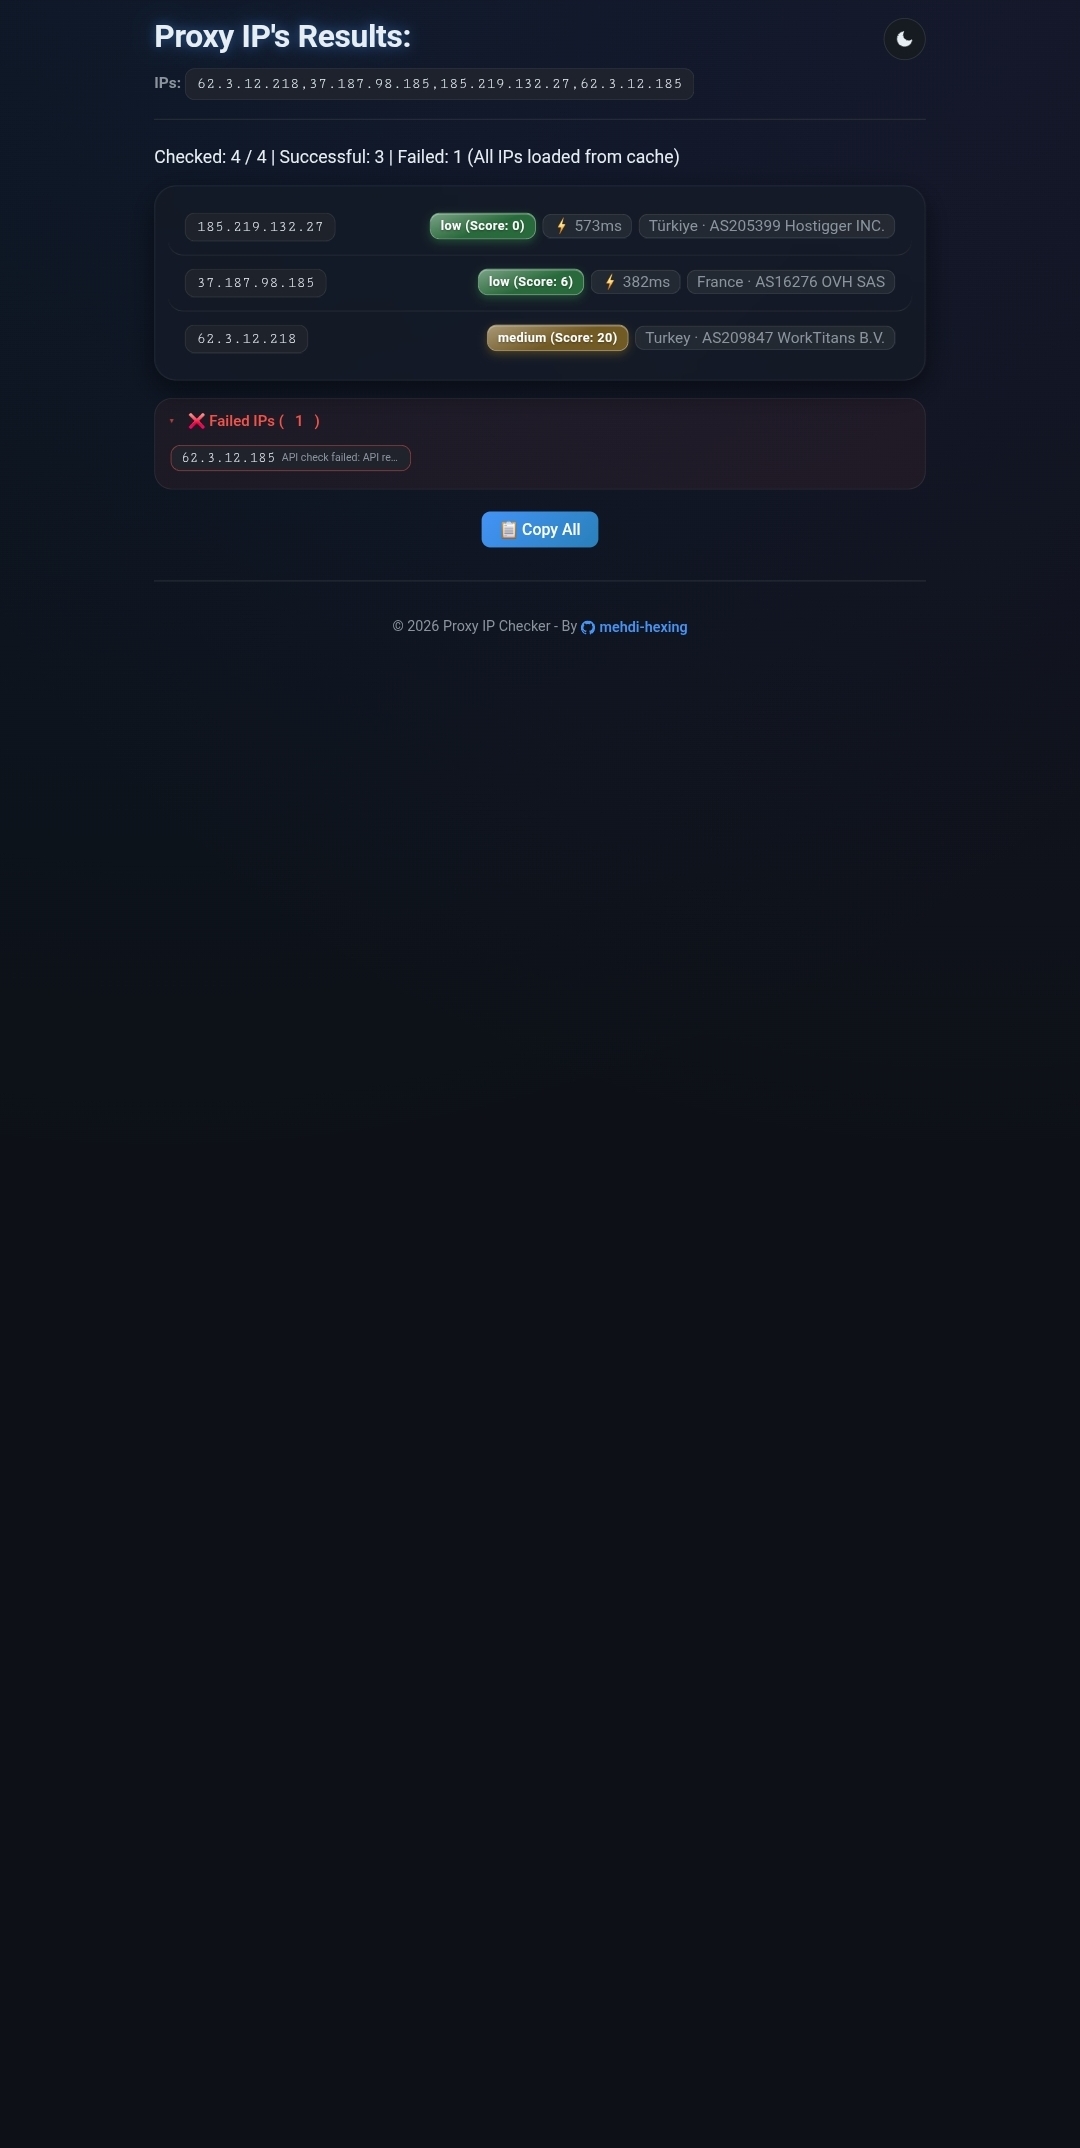
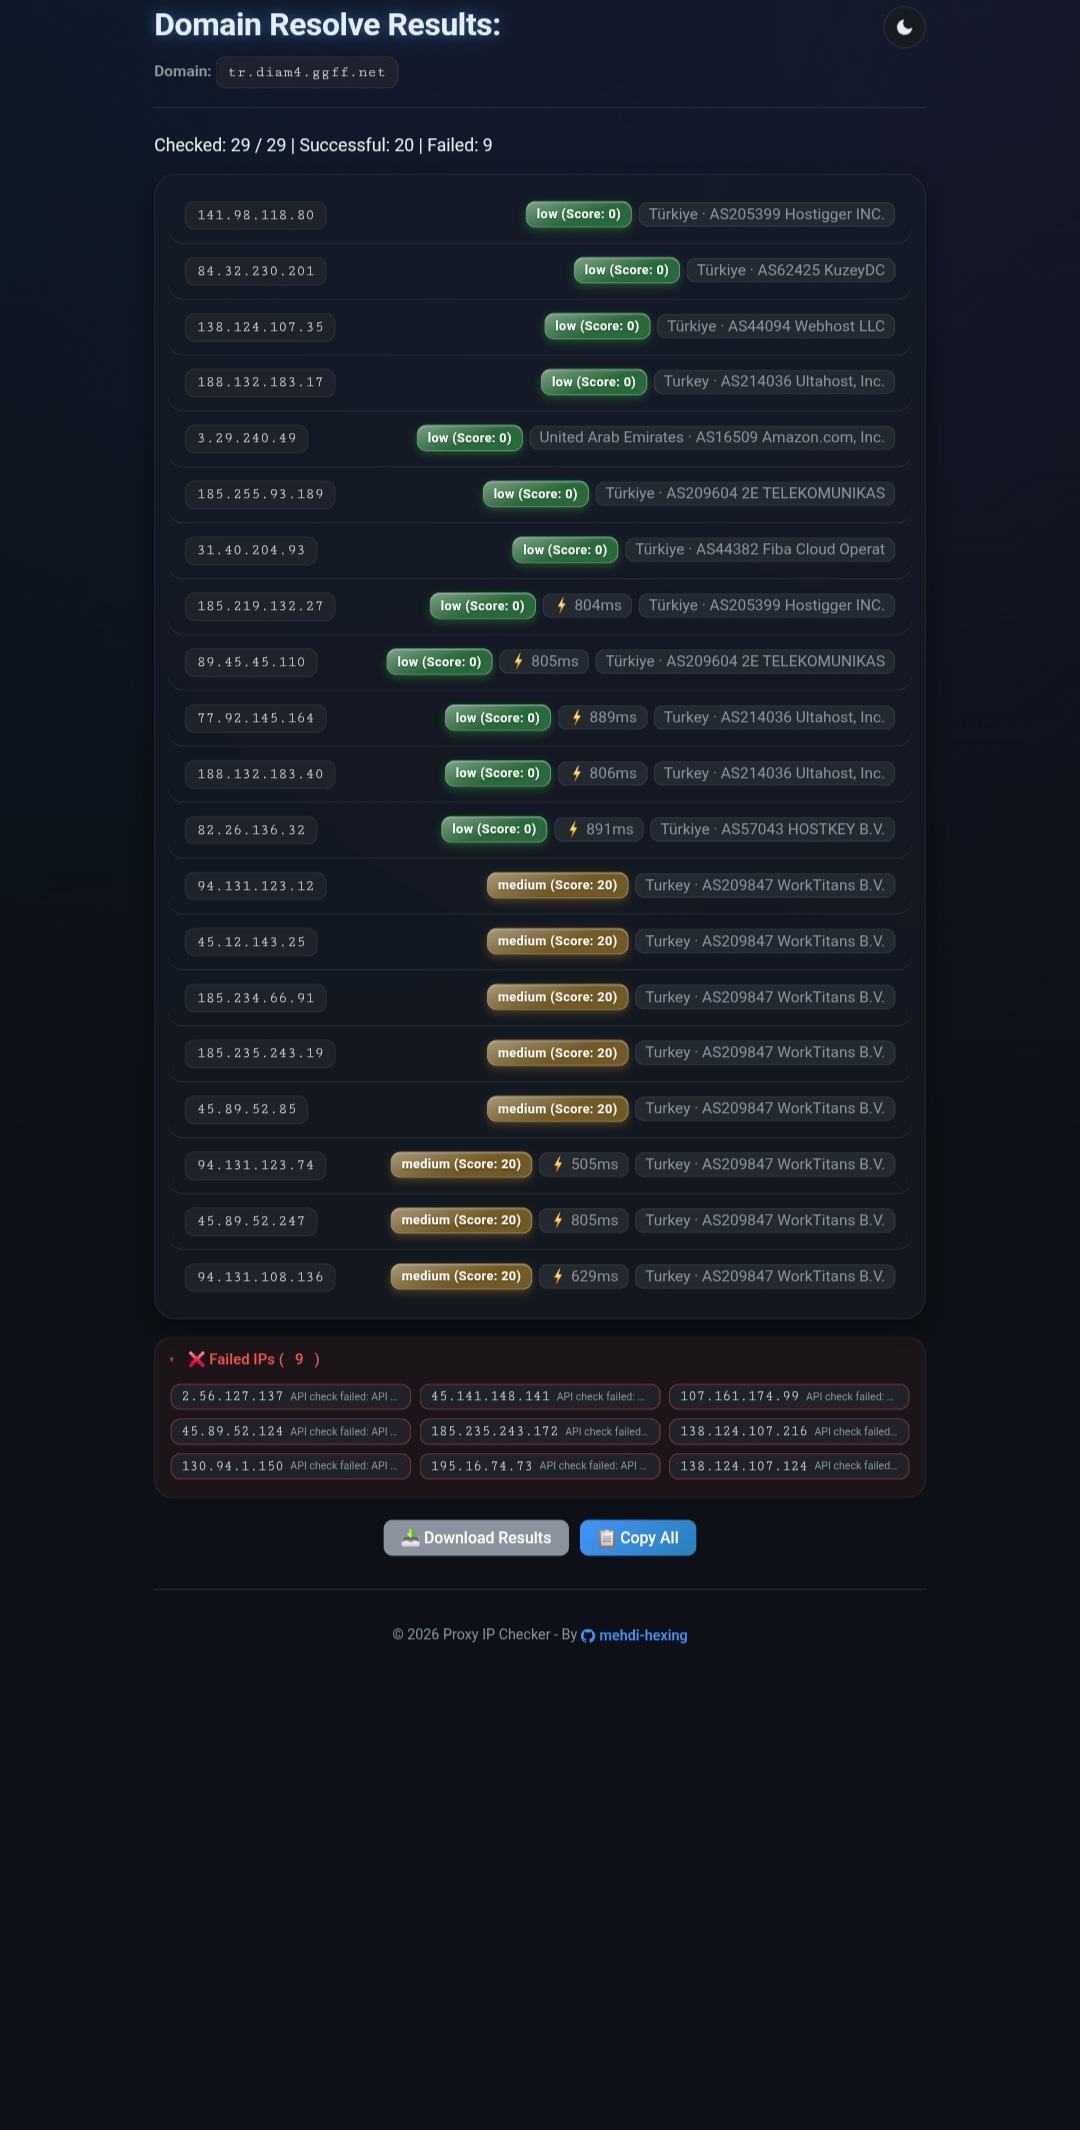
- Displaying failed IPs: every results page (domain, multiple IPs, IP range, or file) also shows the failed IPs along with the error reason.
- Resumable scanning: results are saved incrementally (per IP, not per whole batch), and are also force-saved before the tab is closed or refreshed; refreshing in the middle of a large scan will not cause it to start from zero.
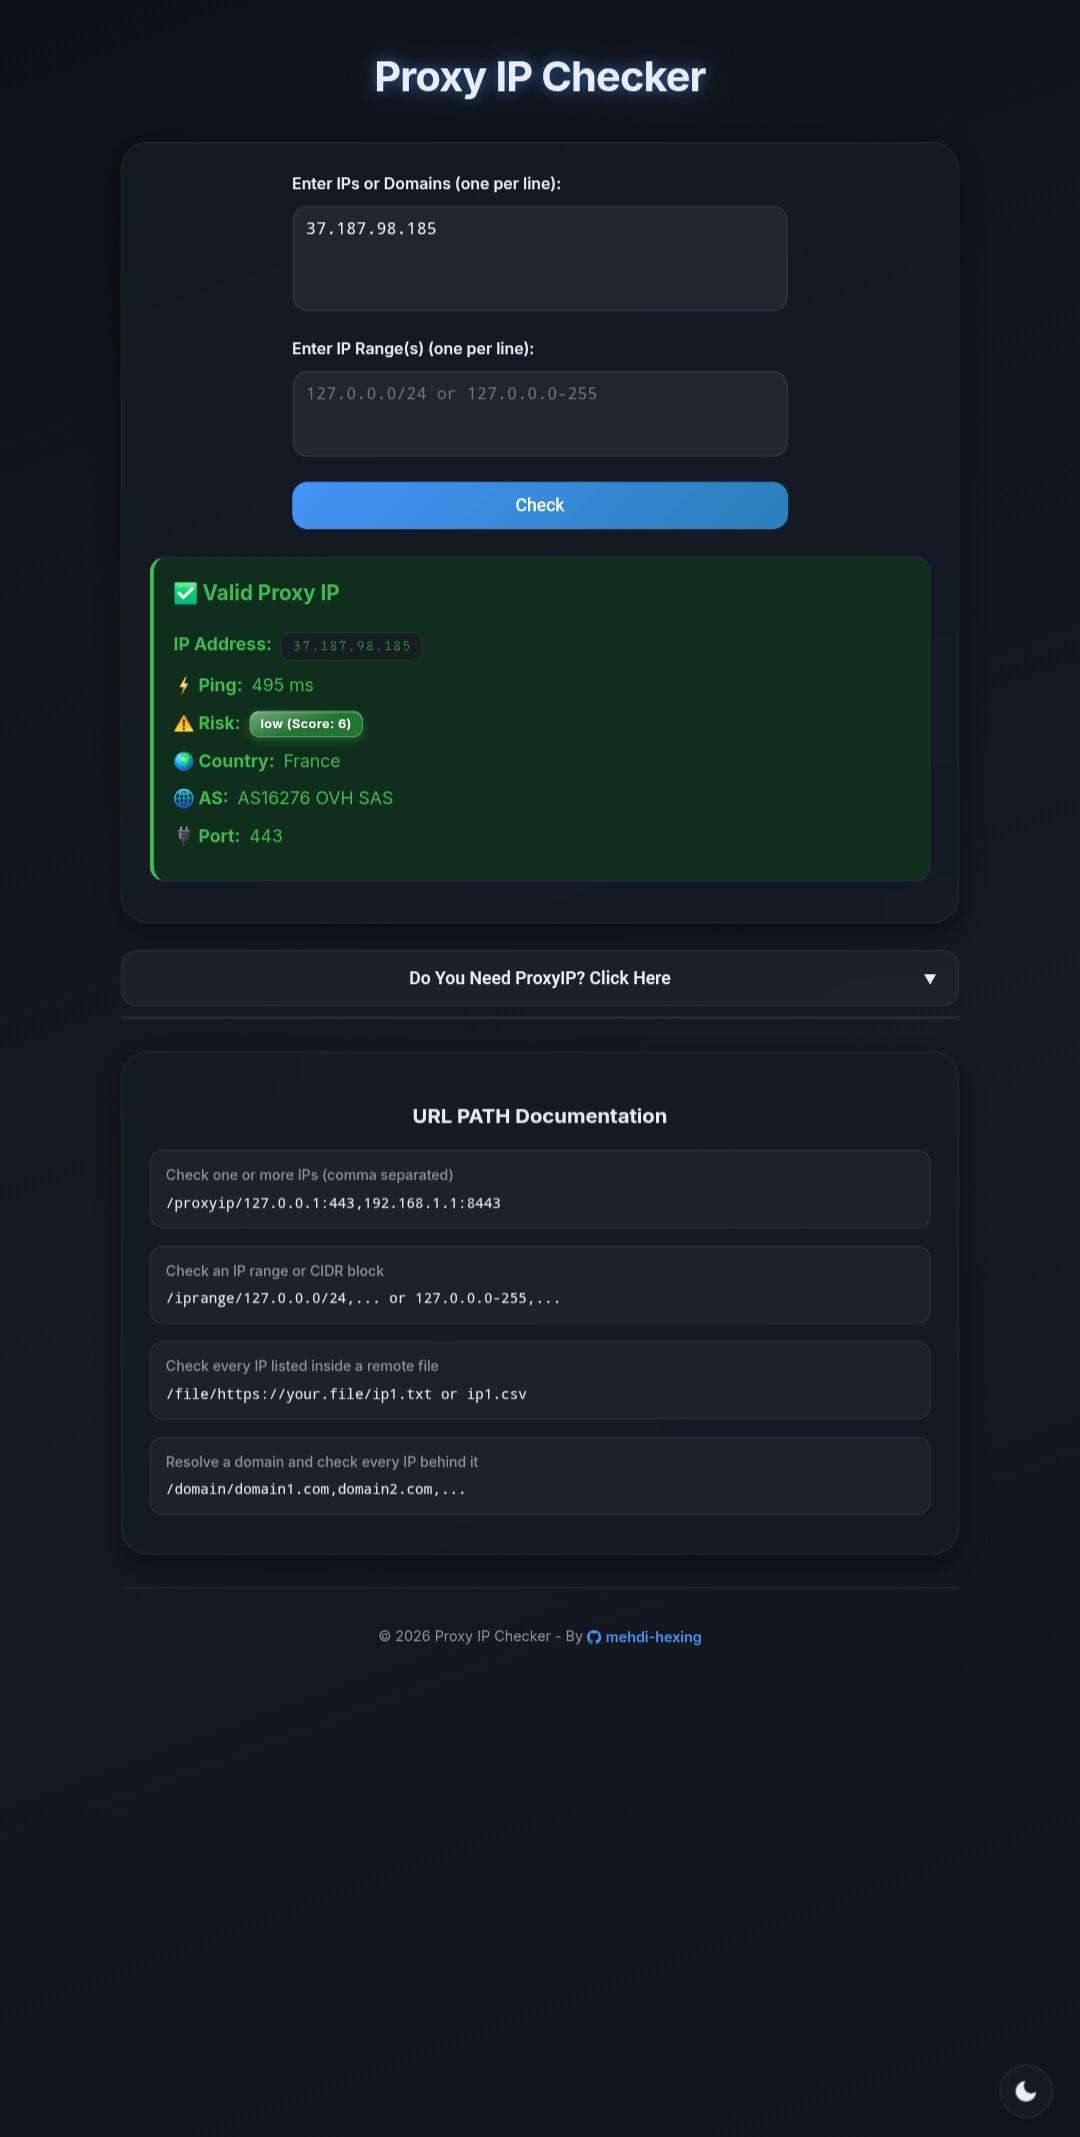
- Complete information: latency, country, organization/ASN, and risk score for every successful proxy.
- Modern UI: soft rounded corners, glass-style cards, light/dark theme.
- High availability: ability to define multiple backend service addresses for redundancy, separate from the Scamalytics and geolocation fallbacks
- Fully serverless: the entire infrastructure runs on serverless platforms; there's no need to maintain a dedicated server.
Prerequisites
- A Cloudflare account
- A GitHub account
- A Vercel or Render account (depending on your backend service deployment method)
- A VPS with Python and Pip installed (if you choose self-hosted deployment)
- A Scamalytics account — optional; without it, the risk score is still calculated via the public mirror
Installation and Deployment Guide
Step 1 — Deploying the Backend Service (Backend API)
There are three ways to run this service; pick whichever one is more convenient for you.
Option A) Deploy on Vercel (easiest method): Vercel
- Go to the ProxyIP-Checker-Vercel-API repository
- Click the "Deploy" button in that same repo's README so Vercel automatically deploys a copy of the project for you
- Save the final address (like
https://my-proxy-api.vercel.app) — you'll need it in Step 3.
Option B) Deploy on Render: Render
Render, like Vercel, is a serverless platform with direct deployment from GitHub, with the difference that it's better suited to a long-running Python service (not just short functions):
- Log into the Render dashboard and click New + then Web Service
- Connect the ProxyIP-Checker-API repo from GitHub (or Fork it first so it's connected to your own account)
- Enter the service settings:
- Runtime: Python 3
- Build Command:
pip install -r requirements.txt - Start Command:
uvicorn checker:app --host 0.0.0.0 --port $PORT - Plan: the free plan is enough to start with
- Note that Render passes the port number to the app through the
PORTenvironment variable, not a fixed value like 8080; for this reason the start command must use$PORT, not a hardcoded number - Click Create Web Service; once the build finishes, Render gives you a permanent HTTPS address (like
https://proxy-api.onrender.com) — use this in Step 3
Free Plan Note
On Render's free plan, if the service doesn't receive requests for a while it goes to sleep, and the next request after that has a delay of a few seconds (Cold Start). If you want the service to always stay awake, either use a paid plan or set up a periodic Cron/Ping to keep it awake.
Option C) Self-hosted deployment on a VPS (full control): VPS
git clone https://github.com/mehdi-hexing/ProxyIP-Checker-API.git
cd ProxyIP-Checker-API
pip install -r requirements.txt

# Run inside a screen session so it stays active after disconnecting
screen -S proxy-api
python main.py --port 8080After running, press Ctrl+A then D to detach from the session (the service stays running in the background). Your service address becomes: http://<Your_Server_IP>:8080 To test:
curl http://<Your_Server_IP>:8080/api/v1/check?proxyip=1.1.1.1Step 2 — Getting a Scamalytics Key (Optional)
By signing up on Scamalytics and requesting an API key; activation is manual and can take up to 24 hours. Even if you set up your own key, if your quota runs out or the official service has a temporary outage, the Worker will automatically switch to the public mirror.
Step 3 — Configuring and Deploying the Worker
3.1) Edit the _worker.js file: inside the checkProxyIP function, replace the apiUrls array with the address of the backend service you deployed in Step 1 (you can add several addresses for redundancy — for example both a Render and a Vercel address):
const apiUrls = [
    `https://proxy-api.onrender.com/api/v1/check?proxyip=${encodeURIComponent(proxyIPInput)}`, // Render address
    `https://my-proxy-api.vercel.app/api/v1/check?proxyip=${encodeURIComponent(proxyIPInput)}`  // Vercel address
];If all of these addresses run into an error or time out, the Worker itself performs a direct TCP test so that a temporary outage of the backend service doesn't take down the whole tool.
3.2) Deploying on Cloudflare Pages:
- Compress the project folder (including your edited
_worker.js) into a zip file. - Then go to the "Workers & Pages" section in the Cloudflare dashboard and click on the "Create application" option
- Then, below that, you'll see a section for the "Pages" tab; click on it, and on the new page, click on "Upload Assets" and then click on the file option.
- Upload the zip file and then click on "Deploy site".
3.3) Setting environment variables (all optional):
| Variable | Value | Required |
|---|---|---|
SCAMALYTICS_USERNAME | Your Scamalytics account username | No |
SCAMALYTICS_API_KEY | Your API key | No |
SCAMALYTICS_API_BASE_URL | Your custom base address | No |
After adding the variables, do a Re-deploy once from the Deployments tab.
Step 4 — Testing and Usage
Open your Pages address (https://your-project-name.pages.dev) and check a known IP such as 1.1.1.1 or a domain such as di.nscl.ir. Other direct paths are also available:
- Multiple IPs:
/proxyip/1.1.1.1,8.8.8.8,[2606:4700:4700::1111]:443 - IP range:
/iprange/1.1.1.0/24 - From a file:
/file/https://raw.githubusercontent.com/user/repo/main/ips.txt - Domain:
/domain/google.com(both A and AAAA records)
Resumable Scanning and Caching
For large ranges or long lists that take a while:
- The result of each IP is saved to the browser's local storage (cache) immediately after it finishes, not after the whole batch is done.
- Saving is also force-performed before the tab is refreshed, closed, or hidden.
- On page refresh, only the IPs that haven't been checked yet are re-tested; previous results (success and failure) are shown immediately.
- Every different input (a new domain, range, or list) has its own separate cache and doesn't get mixed with old results.
IPv6 Support
IPv6 addresses are supported throughout the infrastructure: in the single/multi-IP box, the IP range (bracketed form only), the file-based list, and domain resolution (both A and AAAA records). Geolocation and risk scoring (whether the main service or the fallback mirror) also work correctly with IPv6. The ProxyIP-Checker-API backend service correctly interprets all of these formats as well.
Troubleshooting
- "API check failed" error: since the Worker itself has a fallback to a direct TCP return, this error is rare; if you see it, make sure the backend service (Vercel, Render, or your personal server) is reachable and the necessary port is open in the firewall.
- Risk score shows "N/A" or an error: since there's an automatic fallback to the public mirror, this is also rare; if you're using your own dedicated Scamalytics account, check the correctness of the
SCAMALYTICS_USERNAMEandSCAMALYTICS_API_KEYvalues in your Cloudflare settings. - A scan starts over from the beginning after a refresh: make sure you have exactly the same previous input; a different input intentionally gets its own separate cache.
- 500 error on the Worker: usually caused by a missing environment variable; redeploy after setting the variables correctly.
- The service on Render comes up slowly: this is normal on the free plan (Cold Start); to fix it, either use a paid plan or keep the service awake with a periodic ping.
Related Links
- Main repository:
https://github.com/mehdi-hexing/CF-ProxyIPChecker - Backend service (Vercel):
https://github.com/mehdi-hexing/ProxyIP-Checker-vercel-API - Backend service (Python — deployable on Render or a VPS):
https://github.com/mehdi-hexing/ProxyIP-Checker-API